However, Sharing files and folders on Windows 8 is similar to sharing files and folders on or between Windows 7 computers with one exception which is the password protected option located within the “File and Printer Sharing“ To demonstrate file sharing between Windows 7 and Windows 8 – I will be using 1 x Windows 7 and 1 x Windows 8 running on my VMWare Workstation.
1. Setting up Sharing in Windows 7
- On your Windows 7 computer/laptop go to Control Panel -> Network & Internet -> Network & Sharing Center -> Advanced Sharing Settings
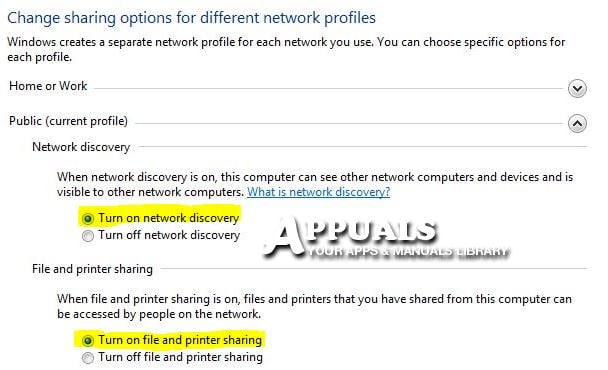
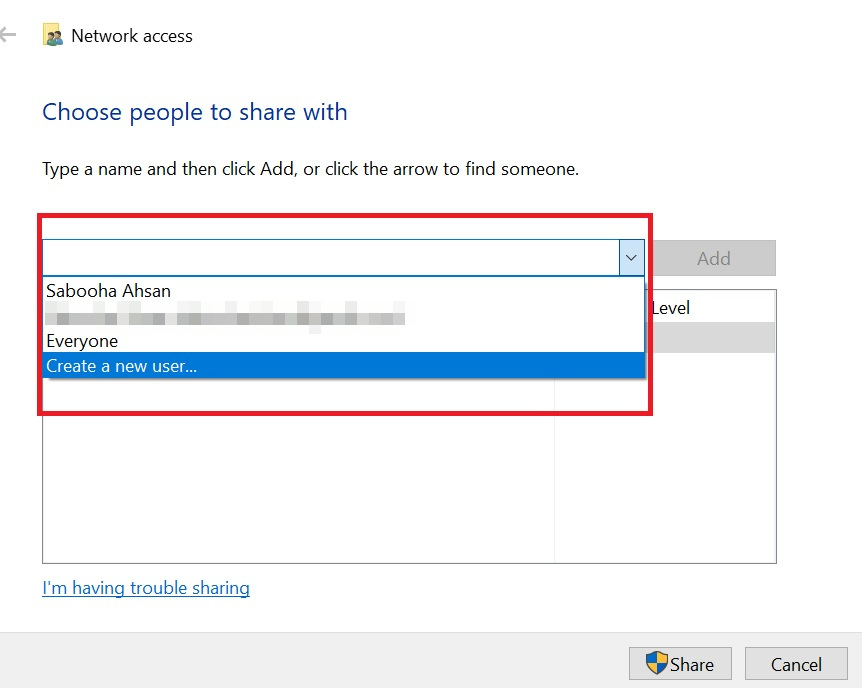
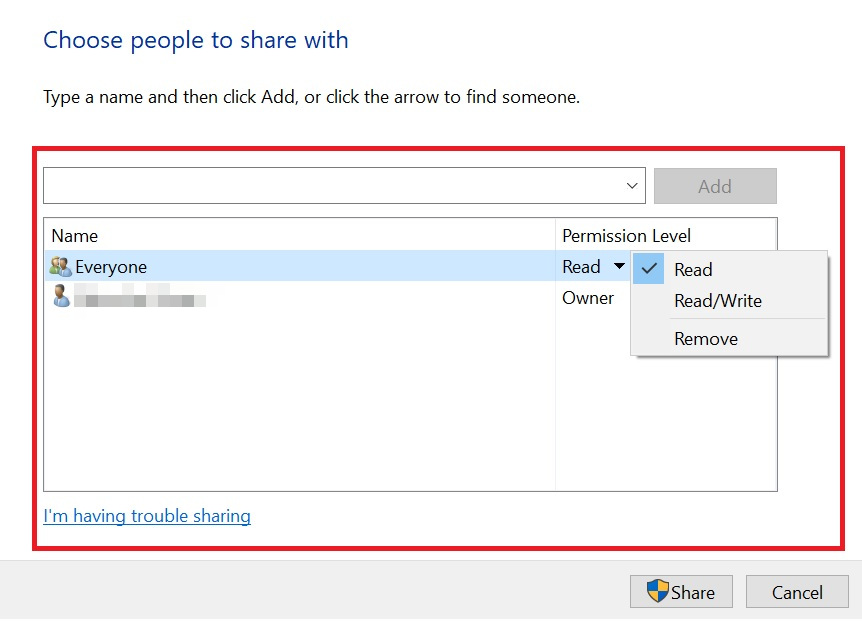
Enable “Turn on network discovery” and “Turn on file and printer sharing“. If you want to password protect your folders then Turn on the password protected sharing which is the last option within the Advanced Sharing Settings. Only users with access on this computer will be able to access the shared folders, when accessing files on other computers you will need to use the username for the Windows 7 computer to access shared folders. Now since we have enabled the required options, Click on the Save Changes button at the bottom. 2. Select a Folder or Folders to be shared from Windows 7 computer. Right click on the folder that you want to be shared and select Share With then select Specific People. You will get the Sharing option on all folders you right-click. You will now be given a field to type in the username or select one from the list available in the pane below. Either select a username here, or create a username and assign a password to the username. When you’ll try to access the folder from the other computer/computers you will be prompted to provide this username and it’s password in order to access this folder. Under the Permission Level, chose what permission the user should have.
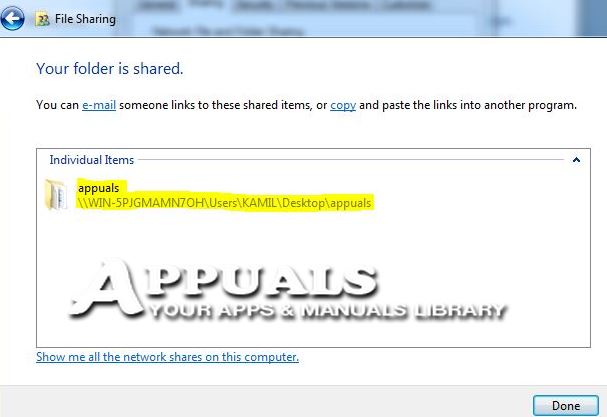
Copy the path shown here (eg:\computername\users\username\desktop\folder) and keep a note of it since you will need this to access the folder on the other computer. Now the folder is shared, click Done. That’s it. You have now shared the folder on this computer.
2. Setting up Sharing in Windows 8
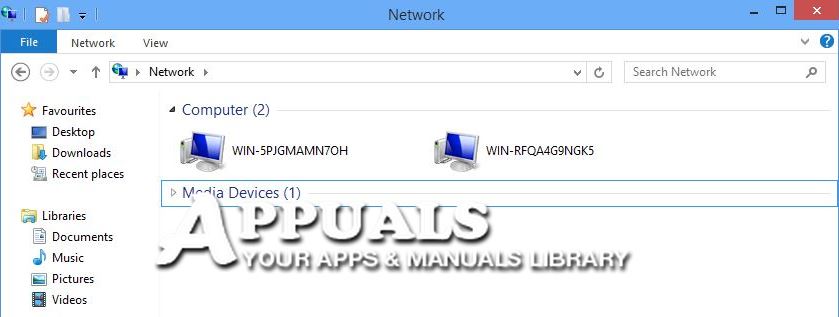
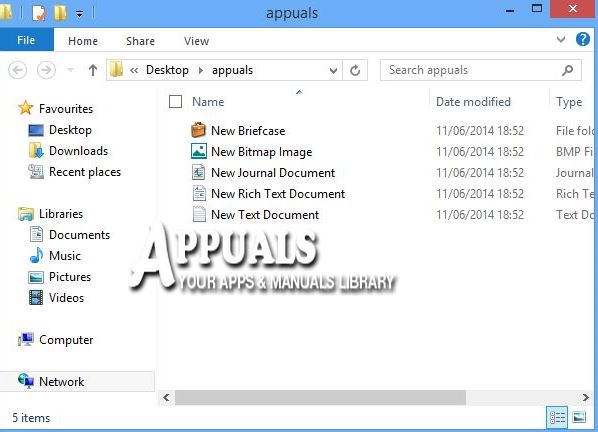
Sharing in Windows 8 is similar to sharing in Windows 7. Go to the Control Panel > Network & Internet -> Network & Sharing Center -> Advanced Sharing Settings and turn the sharing on as you did for windows 7 above. (This is required if you wish to share folders from windows 8), but not if you wish to access shared folders from Windows 7. You may also do a short cut to skip steps and automatically locate other computers on the network such as the Windows 7 one above from where we shared the folder. To do this exit out of the tiles mode to the Desktop mode on Windows 8. Hold the Windows key and Press E. Then select Network from the left menu. You will see a notification on top to turn on “Network Discovery and File Sharing” click on it and turn it on. Within 2-3 seconds, other computers connected to the network will appear. (See screen below) Now simply double click the computer name where the files are shared to view the shared files. If asked for the username and password for the PC where the files are shared, provide it. (This is the username for the PC where the folder is shared) If there is no password setup for the user on Windows 7, then you will be required to set one up. However, this will display everything that is shared. If you only want to access the shared folder then copy the path from the folder which is shared by right clicking on that folder and selecting Properties -> Sharing and then copying the path from under Network Path: in this case it is \WIN-5PJGMAMN7OH\Users\HIDDEN\Desktop\appuals. In the Windows 7 sharing, i also explained how you would copy the path immediately after the folder is shared.
To access shared on Windows 7 simply repeat the same steps as shown above on accessing folders on Windows 8.
3. Setting up a Sharing in Windows 10
3.1 Sharing the Files using File Explorer
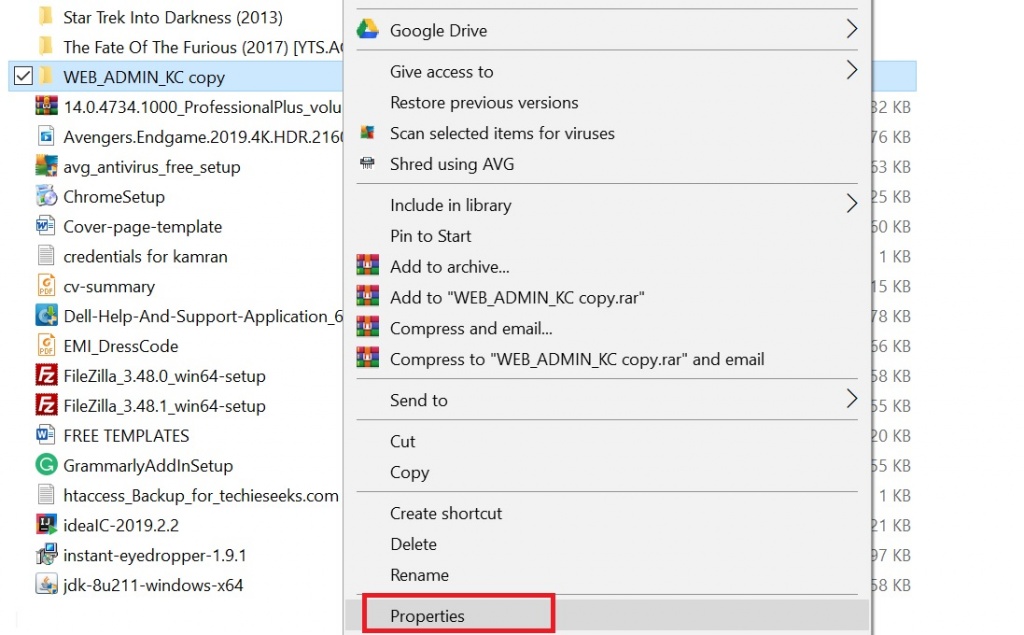
Windows 10 provides a built-in feature to share files. This is visible from the context menu; any file/folder you click will the option to Share Files. You can also define read and write permissions when sharing files or folders. It is important that any devices within which files are being shared are on the same network (Wired LAN) or (Wireless Lan). After following the above-mentioned points, just click the “Close” button and your file will be shared among your target audience by using File Explorer.
3.2 Using Advanced Settings for sharing the files
Advanced settings in Windows 10 allow the users to set custom permissions for any file or folder. For sharing the files by using the “Advanced settings”, use the following steps:
3.3 Sharing files and folders in Windows 10 with a Particular User
Sometimes, there is a need that different files and folders are to be shared not among a group but with a particular user. Follow the following steps if you want to share your files and folders with a particular user in Windows 10:
3.4 Sharing Files Over the Network without using a Password
In Windows 10, the file-sharing is protected by the use of a username and password by default. Sometimes, if you are sharing the file on your local network and you do not want people to access the information by using passwords, then you can disable this option. For disabling this option, follow the following steps: In this way, by using the different methods mentioned in this tutorial, you can easily share your files and folders by using a network in Windows 10.
How Share Passwords Between Google Chrome, Microsoft Edge and FirefoxStep By Step Guide to Adjust Brightness after Upgrading to Windows 8.1Step By Step Guide To Fix Eudora 550 5.7.1 Authentication RequiredStep By Step Guide To Install Microsoft Teredo Tunneling Adapter
